Skip to content
Your chimney liner plays a vital role in keeping your home safe and your fireplace working efficiently. Over time, though, chimney liners can wear out, crack, or become damaged, especially in older homes. When that happens, it’s important to replace the liner to avoid fire hazards, carbon monoxide leaks, and further damage to your chimney system. In this blog, we’ll provide a step-by-step break down of the process of chimney liner replacement for Austin residents so you know what to expect and why it matters.
What’s Involved in Chimney Liner Replacement?
What Is a Chimney Liner and Why Is It Important?
A chimney liner is the protective layer that lines the inside of your chimney flue. It serves three key purposes, starting with protecting your masonry from corrosive byproducts and high heat. It also improves your fireplace efficiency by providing a smooth exit route for gasses and smoke, and it keeps those compounds contained to prevent fires and carbon monoxide leaks.
Without a functioning liner, your chimney becomes vulnerable to dangerous heat transfer and chemical damage. That’s why national safety standards require that chimneys be properly lined. A failing liner is much less expensive and painful to replace than your home or the lives of your loved ones.
Signs You May Need a Chimney Liner Replacement in Your Austin Home
Before replacement, there are often warning signs that your liner is deteriorating. Common indicators include cracked or broken clay tiles in the flue, smoke or gas odors, chimney water damage, poor fireplace performance, or a failed chimney inspection. In these cases, a Level 2 inspection, often using a special camera, can confirm whether a liner replacement is necessary.
Types of Chimney Liners
There are several options when it comes to replacing a liner, each suited to different fireplaces and fuels. Clay tile liners are common in older homes and are an affordable material, but are very labor-intensive to replace. Cast-in-place liners are poured in and hardened to form a new flue interior, and are a is a good option for extensive damage or odd chimney shapes.
By comparison, stainless steel liners are today’s most popular choice, delivering fast and easy installation, durability, and compatibility with wood or gas heat sources. Your chimney professional will recommend the best liner based on your fireplace type, chimney structure, and local codes.
Step-by-Step: What Happens During Chimney Liner Replacement
Let’s walk through the general process of replacing a chimney liner:
1. Inspection and Assessment
The first step is a thorough inspection to assess the condition of your existing liner and chimney structure. This often involves video scanning to check for cracks, obstructions, and sizing, and tells the chimney professional if additional repairs are needed.
2. Choosing the Right Liner
Based on the assessment, your technician will help you choose the best liner material, size, and style for your system. It’s important the liner matches the fuel type and appliance to ensure proper draft and safety, as well as efficient operation.
3. Removal of Old Liner
If your chimney has an old clay liner that’s badly damaged and may impinge on the performance of the new liner in the future, it may need to be removed. This can involve breaking up tiles and extracting them carefully from the flue.
4. Cleaning the Chimney
Before installation, the chimney is swept and cleaned to remove soot, creosote, and debris, including loose pieces of tile and mortar that need to be removed. A clean flue ensures better adhesion and fit for the new liner.
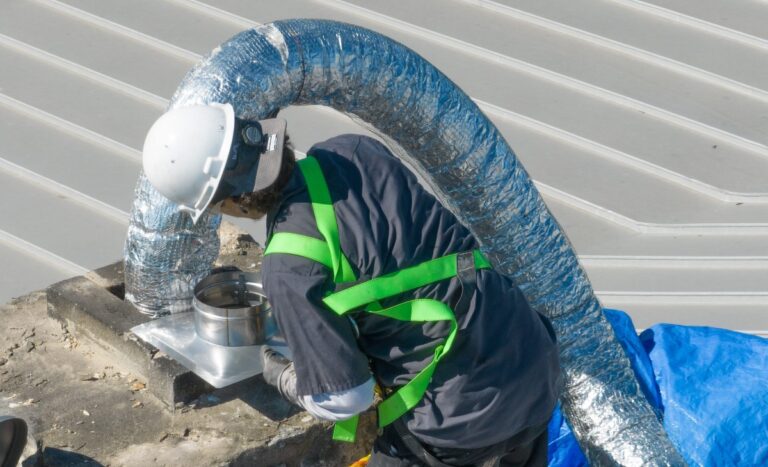
5. Installing the New Liner
Metal liners usually come in flexible or rigid forms. The liner is carefully lowered down the chimney and connected to the fireplace or appliance at the base. It is then insulated if needed, and sealed at the top and bottom to prevent pest infiltration.
6. Final Testing and Inspection
Once the liner is in place, the technician will perform a draft test and visual check to ensure everything is functioning properly. A final report is often provided for your records or insurance, and should be retained with your home’s maintenance records.
How Long Does It Take and What Does It Cost?Don’t Put Off Chimney Liner Replacement!
Chimney liner replacement typically takes four to eight hours, depending on the complexity and type of liner. For this reason, it’s hard to quote a specific price, because all chimneys are different. This cost mainly depends on the type of liner, chimney height and accessibility, and how much removal and repair work is needed. While this might seem like a big investment, a proper chimney liner replacement protects your Austin home from much more costly damage down the road and keeps your family safe.
Don’t Put Off Chimney Liner Replacement!
Replacing a damaged or outdated chimney liner isn’t just a maintenance task. It’s a critical safety upgrade. Whether you use your fireplace daily in winter or just a few times a year, a properly installed liner ensures your system vents correctly and doesn’t pose a risk to your home. If you have concerns about your chimney liner replacements, flue inspections or repairs in Austin, contact the chimney professionals at Wolfman today to schedule a consultation!
Reach us online, send us a text, or call us at 830-620-4335 today!